♫ ♪ ♪ It’s the most wonderful time of the year… ♪ ♪ ♫
And it’s time to deck the halls. Or the mantle. Whichever. But we have a mantle this year, which means we finally have somewhere to hang stockings properly. Which also means we need stocking holders!
After some looking around at all the many options available, we (of course) decided to make our own. However, we (of course) have very different ideas of what the ideal stocking holder should be. And so we (of course) decide to have a competition. Which of us can make the best stocking holder? Well we shall see.
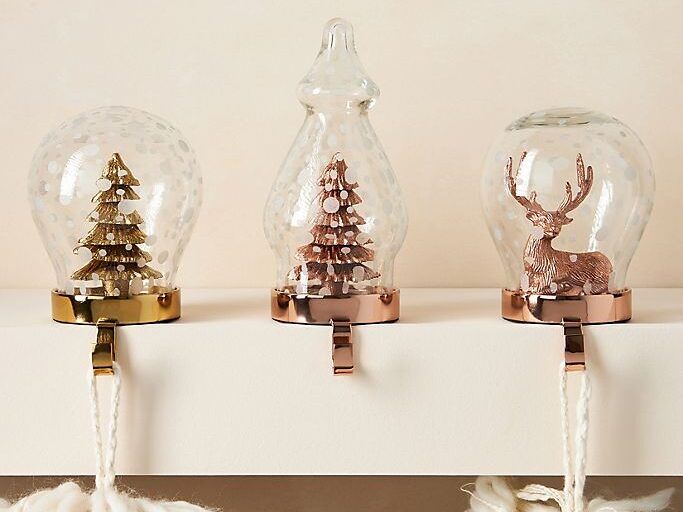
My little stocking holder is inspired by these beauties found at Anthropologie…

At 38 bucks a pop, though, that was a little more than I was willing to spend. If you have a little extra spending cash though, they’re kinda hard to pass up!
But if you don’t have that kind of cash laying around, read on…
What You’ll Need
Okay, these stocking holders are not only inexpensive, but they’re also really easy and don’t take a lot of time. So here’s what you’ll need:
- Small round glass candle holder (I got this one from Hobby Lobby. $0.99? Yes, please)
- Inexpensive stocking holder base (I used this from HL. With their 50% sale, you can get a pack of 2 for $5)
- Adorable miniature Christmas item to put inside…ideas below
- Paint or Spray paint – totally optional, but opens the color and style options way up for a little bit of $
- Hot glue
Okay…see that little adorable present? You, yes you, can make that to use as your item to go inside. It’s super easy, and you can “wrap” it however you want. You can watch how in my video here. There are lots of other options too, we’ll talk about that in a minute.

That’s it!! Now on to the fun part.
Step 1: Paint Stocking Holder Base
Like I said before, this is actually optional. But if you do want to paint your base, do this first. It will need a couple hours to dry.
I’m gold all the way, but buying anything gold is usually quite a bit more expensive (whyyyy). So, paint is great. I had some gold spray paint from another project we did a couple weeks ago, so I just used that. The spray paint application was super simple, but you can use regular paint too, of course.
If you’re using spray paint, lay a tarp out and then place the stocking holder on small block of wood. This keeps the paint from getting on the underside of the base.

Spray a thick even coat on. Forget the multiple light layers like the can instructions say. For this one, go for one thick coat. Let dry thoroughly before assembling.

Step 2: Prepare the Globe + Mini Item
Next is getting your globe ready.
First, you’ll want to clean your round glass candle holder really well. Get all the little smears and specks of dust off, especially on the inside.
Next, prep the item you’ll have on the inside. It could be a little mini present you make, a mini Christmas tree, mini snowman, whatever makes you happy! Check out Hobby Lobby’s “My Little Christmas” section. These little trees are perfect.

Don’t forget, here’s how to make a mini Christmas Present. You can either paint the box or wrap it, whichever gives you the look you’re going for.
3. Assemble
Once your base is dry and you have your mini item ready to go, it’s time to assemble. This is where you’ll need your hot glue gun ready to go.

I found it helpful to try positioning the globe in a few different places before securing to figure out where I liked it best. I ended up liking the globe closer to the front of the base. Once you have figured out where you want you globe, use a pen or marker to mark the position of the center of your mini item.

Use a small dab of glue to secure your mini item to the base.

Next, carefully apply the glue around half of the rim of the globe. You’ll want to work fairly quickly here so the glue doesn’t dry, and you only want to do the back half of the globe. Gluing the back half is enough to secure the globe to the base, and it keeps the front nice and clean.


4. Admire Your Pretty Stocking Hanger!
And. that’s. it. How easy was that? It’s soooo cute! Go on, try it! I’d love to see YOURS if you do try it. 🙂

*Cue the Christmas Music*


Oh, and be sure to check out Michael’s version of DIY stocking holders here.
Merry Christmas, guys! Enjoy the little things. – Nicole
